
Avalanche Pie

All is quiet on the mountain tonight, perhaps TOO quiet. You’ve been happily enjoying the fresh snow that piled up over the weekend, but what you don’t know is that the snow that’s built up on the mountainside has been building up a bit too precariously. It’s ready to tumble at the slightest disturbance. So bundle up and enjoy that hot chocolate while you can, because there’s about to be an AVALANCHE!!
As the snow tumbles down and traps you in a frozen cocoon of ice and regrets, you’ll realize you have a LOT of time while you wait for rescue. So why not make this no-bake Avalanche pie?
This pie is inspired by the avalanche bark from that good ol’ Rocky Mountain Chocolate Factory. The main components are rice crispies, marshmallows, peanut butter, and white chocolate. I also was inspired by a lab item they had at milk bar recently which was called an Avalanche, and I was like “the heck is that” so I looked it up and was like “oh snap that’s delicious…I’m going to make a pie of that.” Anyways, there are quite a few components in this pie, and it’s definitely not for the faint of heart (due to difficulty AND the amount of sugar in it).
The first version of this that I made was a bit too sweet so I adjusted some of it like added more PB and put less marshmallow fluff on top, but FOLLOW YOUR HEART, if it’s still beating that is.
ALRIGHT so first things first is the crust. It’s just a classic graham cracker crust, but with browned butter instead of just melted. So brown your butter first, and while that’s going, combine your graham crumbs, sugar and salt into a bowl. Once your butter has browned, pour that in and mix everything together. It should stick on itself when pressed, if it doesn’t, you may need to add a little more butter. This extra butter you can just melt and don’t have to brown.
Pour the crust mixture into a pie tin that’s been sprayed with non-stick spray (important because otherwise it’ll stick and be really hard to get slices out). Press down all along the bottom and up the sides of the pie tin, I like to sort of pinch the edge of it so it creates a nice clean edge. Once that’s done, throw it into the freezer to set until you need it.
OK so the first complicated component of this pie is the White Chocolate Peanut Butter Pudding. This is going to be your main filling of the pie. I find when making a pudding/pastry cream it’s always best to weigh out ALL of your ingredients first before you really even get started. SO, combine your white chocolate, PB, and butter into a large bowl and set it aside.

Then in another large bowl, combine your egg yolks, sugar, and corn starch and whisk those together. Cover with a towel or plastic wrap because other wise it’ll get a weird skin on it. Save 3 of your egg whites because you’ll use those later for the fluff.
Finally pour your milk into a medium-large pot on the stove. Now that everything is weighed out and ready to go, turn the heat on your stove and heat the milk to a scald, or not quite a boil. You’ll know it’s ready if you touch it and its crazy hot but doesn’t really burn you (I don’t actually suggest doing this). Once your milk is at a scald, turn the heat off and pour 2/3 of your milk into the bowl with the egg yolks and whisk. This is called tempering your yolks which basically means you’re bringing the yolks up to temp without them curdling.
Pour that egg/milk mixture back into the pot and return it to the heat. Make sure the heat is low-medium otherwise it’ll burn. While the custard cooks, WHISK CONTINUOUSLY. Seriously DO NOT STOP WHISKING. If you do stop you WHISK your custard curdling or burning! So whisk like your life depends on it, because it actually does, and keep whisking until the pudding has started to thicken.

Once it’s started to thicken, TURN OFF THE HEAT, and continue stirring for another 30-60 seconds. The custard will continue to thicken as you stir.
After it’s nice and thick, like the photo above, and like the amount of snow covering your home making it impossible to ever leave your house again….use a fine mesh strainer to strain the custard into the bowl with the white chocolate etc. that you prepped earlier. Let it sit for a minute or two to melt the chocolate and butters, then whisk together until it’s totally smooth. If it isn’t smooth, you can always use an immersion blender to sort of help it along, but you should be ok.
Grab that crust you made earlier and bring it out. Pour your pudding into the pie crust until it reaches the top edge of the crust. There might be some extra pudding, and if there is, go ahead and pour that into a jar or something and cover it and put it into your fridge for a little PB Pudding snack. Meanwhile, throw some roasted peanuts on top of your filled pie. I used un-salted ones because I wanted to be able to control the amount of salt in the pie but follow your heart!
Then cover the pie with plastic wrap, making sure to press it down onto the top of the custard. If it’s not touching it, a weird skin will form on the top and nobody wants that.

Let that sucker chill in your fridge for AT LEAST like 4-5 hours, better if you can do it over night so the pudding can completely set.
Once it’s set, it’s time to make your marshmallow fluff.
***THIS IS SUPER IMPORTANT: if you don’t have a stand mixer, I really don’t suggest making the fluff from scratch, I’d suggest just buying some from the store because you’ll be working with some molten hot sugar and it can get super dangerous if you’re using a hand mixer so I just want you to be careful!!***
ok, so if you have a stand mixer, it’s time to make the fluff! First, bloom your gelatin in a small bowl with some water, and then your egg whites and cream of tartar into the bowl of your stand mixer.

once the gelatin is bloomed (it’ll be kind of solid), pour it into the mixer with your egg whites. Using the whisk attachment on your mixer, mix the whites/gelatin/tartar on medium.
While that mixes, combine your sugar, corn syrup, and water into a medium pot on the stove. Heat that up until it reaches 242ºF. Once it reaches that temp, remove it from the heat immediately and turn your mixer up to high.
SLOWLY pour your sugar into the bowl of the mixer while it mixes. Let it run down the side of the bowl so it can cool just slightly before it reaches the eggs, that way it wont cook them immediately.

Let that mix on high until you get STIFF peaks and it’s shiny. It’ll look something like this if you pull your whisk out.

Once your fluff has reached stiff peaks, it’s done! Pour however much you want on top of your pie (I didn’t put the whole thing…maybe like half because I didn’t want it to be so sweet).
Toast the top of your mallow with a torch if you want, or don’t! it’ll still be tasty without it. Then put it into the fridge to chill/set again for another like 20 minutes while you make the rice crispy garnish.
For the rice crispies, all you have to do is melt your white chocolate (I did about 1/4 cup). You can melt it in the microwave, just make sure to do so in 15 second bursts with it on 1/2 power, and mix in between. You can also melt it in a heat safe bowl over boiling water. Pour the melted chocolate over 1/2 cup of rice crispies and mix until all are coated. Turn that out onto a cookie sheet lined with a silpat OR just a plain cookie sheet just make sure it’s completely clean and dry. Let it cool and harden for about 15-20 minutes then break it up into smaller pieces.
Now just use that to garnish your pie however you want and you’re GOOD TO GO! Enjoy all of that hard work and the sugar coma that’s sure to follow!

Avalanche Pie
- prep time: long
- cook time: TOO MUCH
- total time: The rest of your life
Servings: 1 pie and some extra pudding for a treat
Graham Crust:
Ingredients:
- 1 c. Graham Crumbs
- 3 oz Butter, melted/browned
- 42 g. (¼ c) Sugar
- Small pinch Salt
Instructions:
- Brown butter.
- Combine graham crumbs, sugar and salt in bowl and mix together.
- Pour in browned butter and mix until it sticks together when pressed down.
- Pour into a 9 inch pie tin sprayed with pan spray and press down across the bottom and up the sides.
- Chill in freezer until needed.
White Chocolate Peanut Butter Pudding:
Ingredients:
- 3c Whole Milk
- 150 g. Sugar
- 6 ea Egg Yolks (keep whites for later)
- 45 g. Corn Starch
- ¾ tsp Salt
- 170 g. White Chocolate
- 3 T (43g.) Butter
- 150 g. Peanut Butter (creamy)
Instructions:
- Combine white chocolate, butter, and peanut butter in a large bowl and set aside.
- Combine sugar, egg yolks, corn starch and salt in a large bowl and cover with a towel or plastic wrap.
- Pour your milk into a medium pot on the stove (it should be bigger than you think because you’re going to eventually add the egg mixture into the pot).
- Heat your milk to a scald.
- Pour ⅔ of your hot milk into the bowl with the eggs, whisking the whole time.
- Pour the egg mixture back into the pot and turn the heat down to low/medium.
- Whisking continuously, heat everything until it thickens. (I pull it from the heat the SECOND it starts to thicken, because it’ll continue to thicken as you stir it)
- Remove from heat and continue stirring for 30 seconds.
- Strain into the bowl with the chocolate/PB and whisk everything together.
- Pour your pudding into your prepared pie crust and top with toasted peanuts. (I used unsalted because I wanted to control the saltiness of the pie)
- Cover with plastic wrap, and make sure it TOUCHES the top of the pudding, if it’s not up against it, it’ll get a weird skin.
- Chill in refrigerator for 4 hours or over night is better. The longer it has to set the better.
Marshmallow Fluff
Ingredients:
- ¾ c. Sugar
- ¾ c. Corn Syrup
- ⅓ c. Water
- 3 ea Egg White
- ½ tsp Cream of Tartar
- 1 tsp Vanilla (extract or paste)
- 1 tsp Unflavored Gelatine
- 1T Water
Instructions:
- Bloom gelatine in water in a small bowl for about 5 minutes
- Combine egg whites, cream of tartar, and bloomed gelatine in the bowl of a stand mixer (or in a medium/large bowl) and mix on medium with the whisk attachment. If you’re using a bowl and hand mixer that’s fine too it’ll just take a little more coordination once you add in your hot sugar.
- Combine sugar, corn syrup, and water in a pot on the stove and heat to 240ºF.
- Once your sugar is at the correct temperature, move quickly to pour the sugar into the bowl WHILE the whites are mixing on high.
- Let whip to STIFF peaks then add in your vanilla.
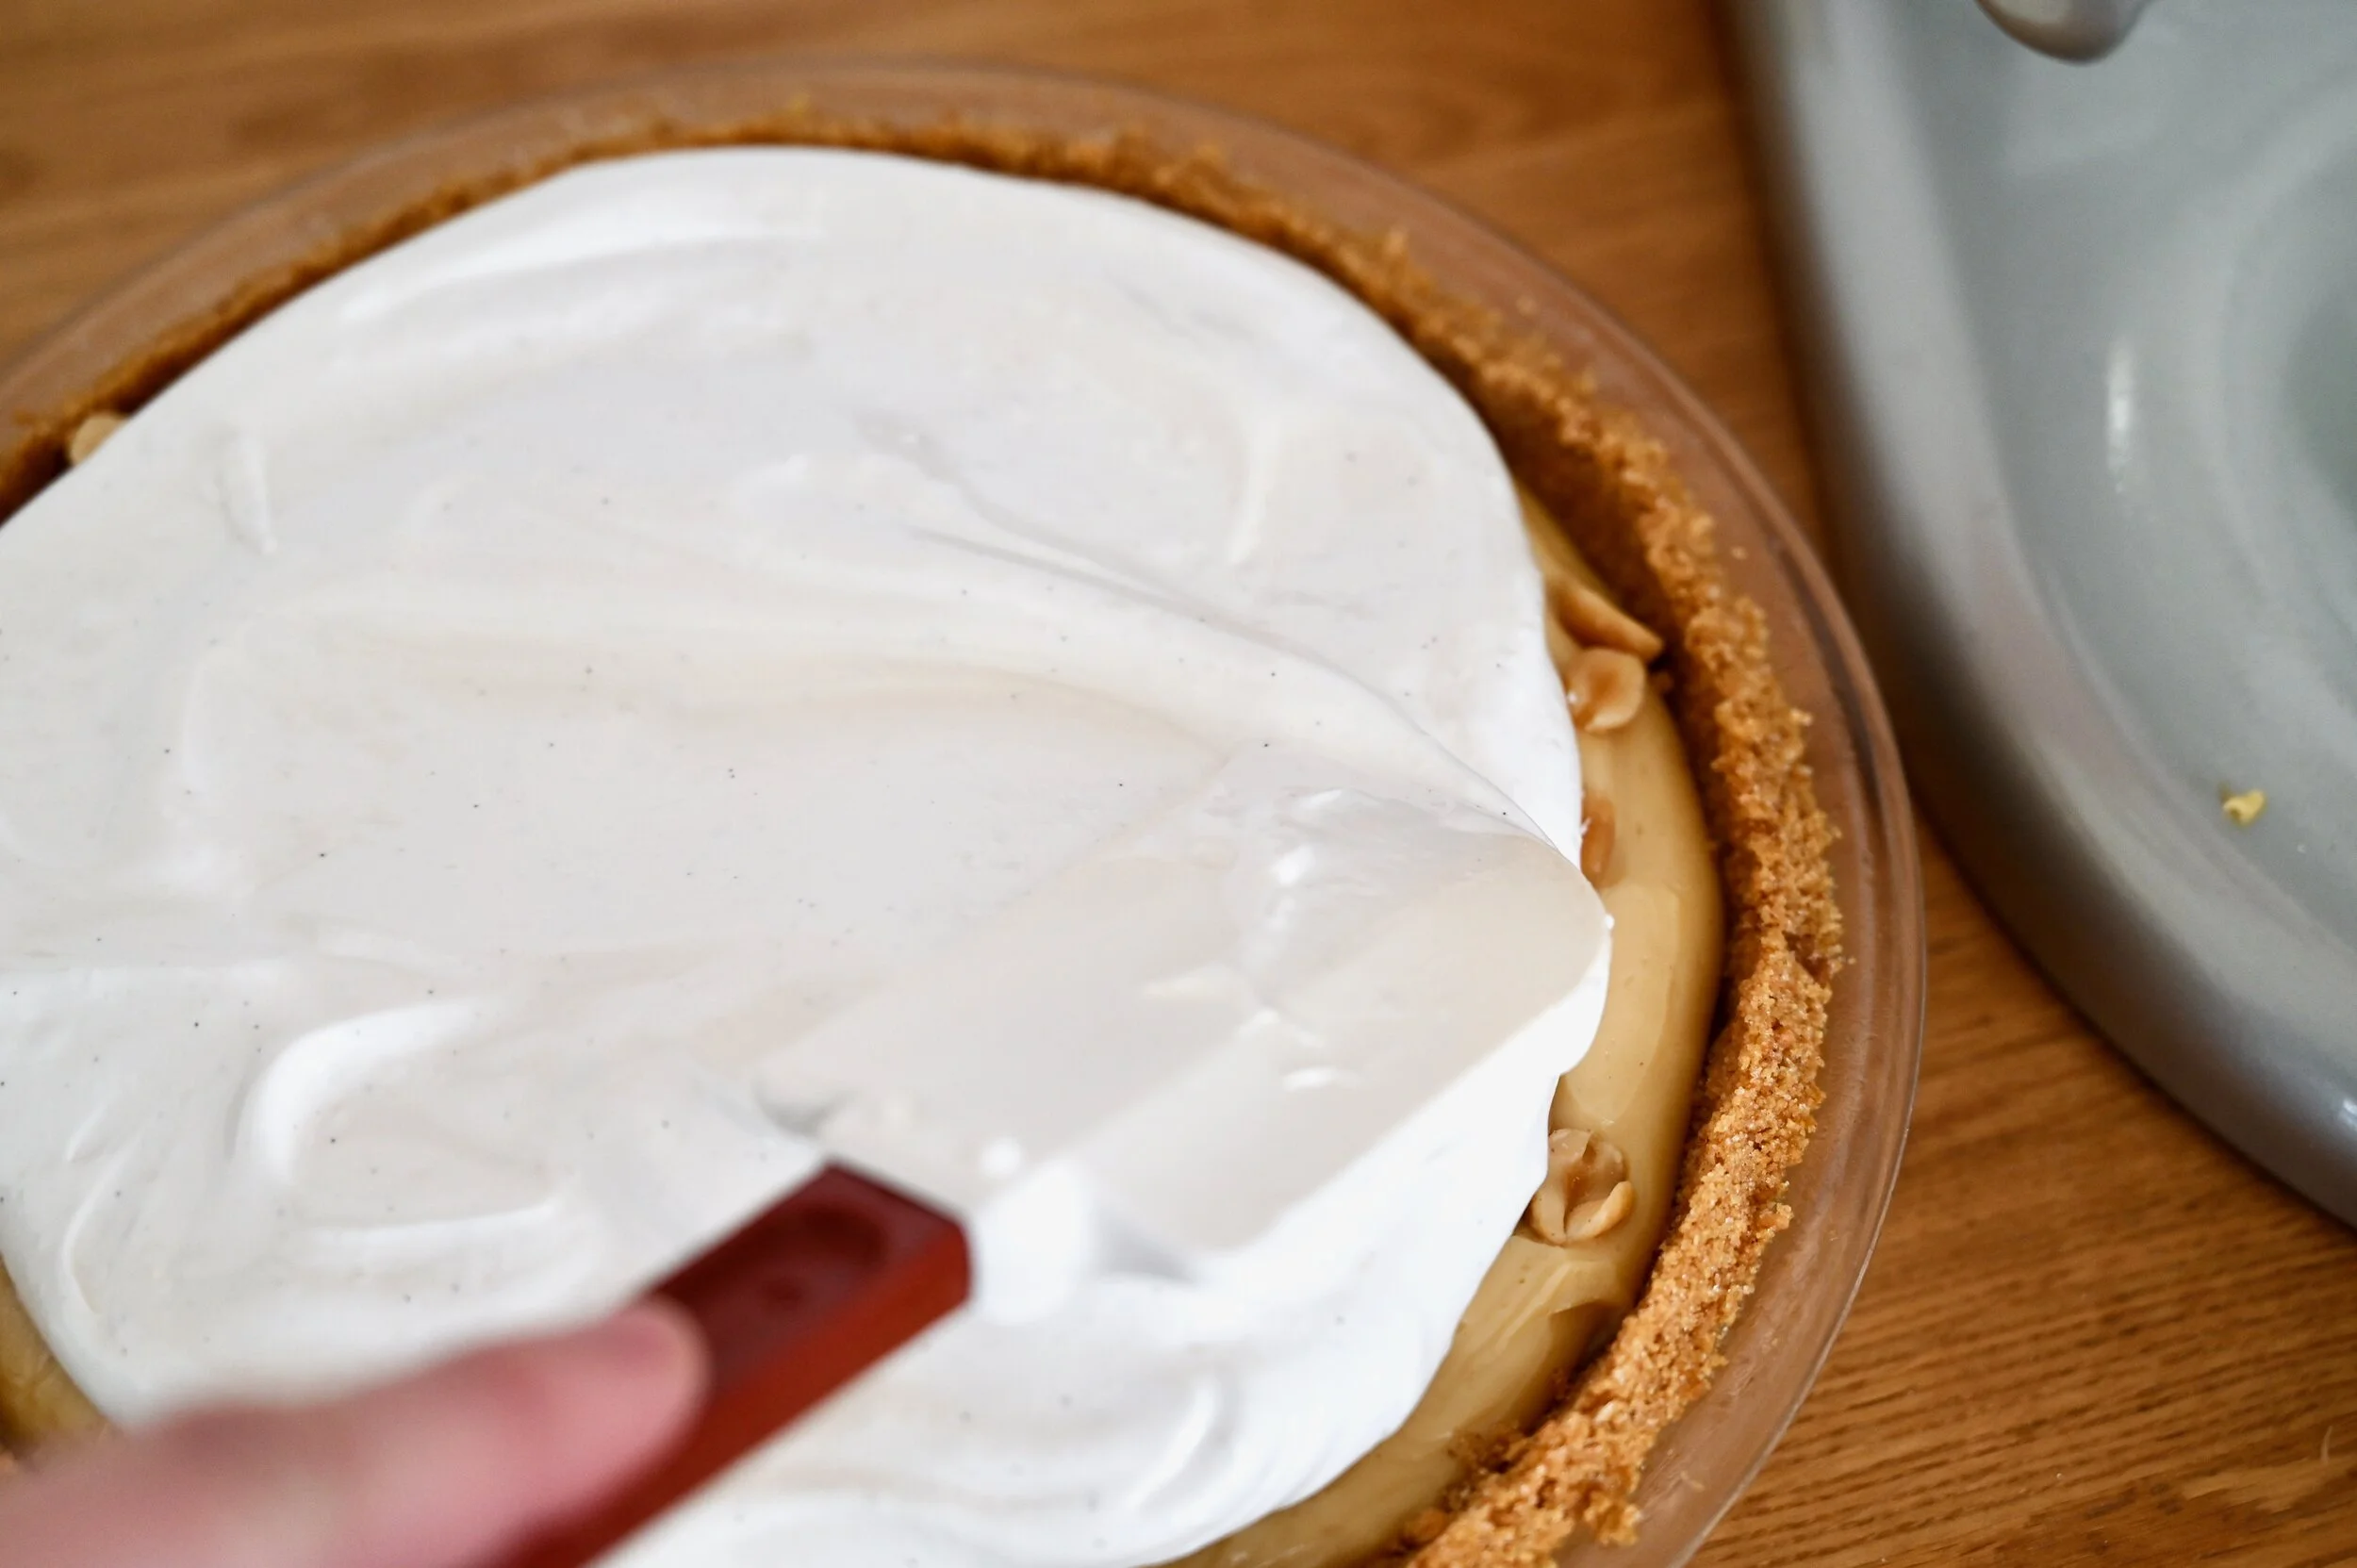
- Remove your pie from the fridge and remove the plastic wrap from the top of the pie.
- Pour a good amount of fluff on top of the pie and spread it across the whole thing (you can add as much or as little as you like depending on how sweet you like things).
- Toast the top of the mallow with a kitchen torch, OR put it under the broiler for like 1 minute tops, just until the top of the mallow gets nice and toasty. You can also not toast it too, it’s also good that way, I just wanted the toasty flavor.
- Put back into your fridge and let everything set up.
White Chocolate Covered Rice Crispies
Ingredients:
- ¼ c. White chocolate, melted
- ½ c. Rice Crispies
Instructions:
- Melt white chocolate in a heat safe bowl either in the microwave in 15 second intervals, or over a small pot with water on the stove (bane marie style)
- Pour melted chocolate over rice crispies, and mix to coat all of them.
- Pour out onto a cookie sheet lined with a silpat or if you don’t have one you can pour it onto the sheet directly just make sure it’s super clean and dried.
- Let cool until hardened and then break up into smaller pieces.
- Remove pie from oven and place your chocolate covered crispies onto the top as garnish however you’d like!